Twitter remains a leading platform for real-time news, marketing, and personal expression. However, creating a Twitter account can be challenging for users in certain regions or those using shared networks. Many accounts face bans or verification issues right after registration. To avoid these problems, static proxies offer a practical solution. This guide explains how to use static proxies effectively when signing up for a Twitter account.
🌐 Why Are New Twitter Accounts Often Suspended?
Twitter’s security systems actively block suspicious accounts. New accounts frequently get flagged due to several common reasons.
👉 Suspicious IP addresses: When you sign up from a blacklisted IP, your account might be challenged.
👉 Unstable or changing IPs: Switching IPs during or after sign-up often triggers security systems.
👉 Datacenter IPs: Shared or abused IPs lead to faster bans.
👉 Multiple accounts on one IP: This pattern appears bot-like to Twitter.
👉 Geo-inconsistencies: Twitter may request extra verification if your IP region and profile data don’t match.
💡 Why Are Static Proxies the Best Choice?
Static proxies provide several key benefits that make them the best option.
👉 Consistent digital identity: Using a static proxy means your IP stays the same, helping build trust with Twitter’s systems.
👉 Better reputation: High-quality static proxies are less likely to be blacklisted.
👉 Geo-targeting flexibility: You can select an IP from a country with fewer restrictions, such as the US or UK.
👉 Reduced security challenges: Accounts created through static proxies encounter fewer CAPTCHAs.
👉 Natural usage patterns: The behavior of accounts using static proxies resembles real users.
Step-by-Step: How to Register Your Twitter Account Using a Static Proxy
Follow these steps to register safely.
1️⃣ Choose a Reliable Static Proxy Provider
Select a provider offering clean IPs with a good history.
➡ Pick regions where Twitter is easily accessible.
➡ Avoid free or shared datacenter proxies.
➡ Check that the provider offers fresh IPs.
2️⃣ Configure the Proxy
Set up the proxy details in your browser or system network settings.
➡ Confirm the proxy location matches your target region.
➡ Verify your setup with an IP checker before registering.
3️⃣ Prepare a Clean Browser Environment
➡ Clear cookies and cache.
➡ Use a fresh browser profile or anti-detect browser.
➡ Stick to private networks, avoiding public Wi-Fi.
4️⃣ Sign Up on Twitter
Open Twitter’s site while connected to your proxy.
➡ Enter a valid email or phone.
➡ Choose a unique username and strong password.
➡ Complete any CAPTCHA.
➡ Stay on the same proxy during sign-up.
5️⃣ Maintain a Consistent Login Pattern
➡ Always log in using the same static proxy.
➡ Use the same device or browser profile.
➡ Avoid switching IPs post-registration.
Practical Example: Using a Static Residential Proxy with QuarkIP
1.Log in to the QuarkIP dashboard, select your desired region and plan, and place your order
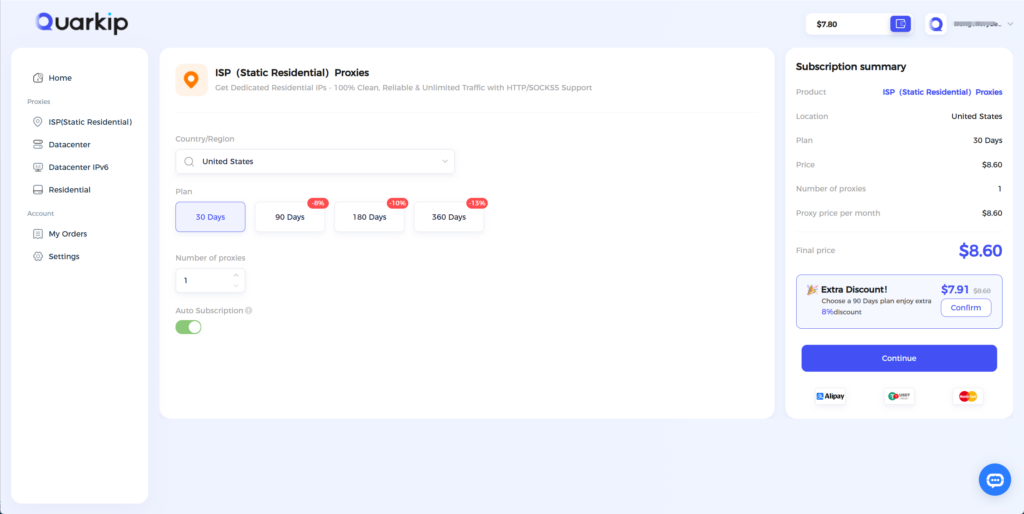
2.Configure the proxy in your fingerprint browser, open the configured window, and visit Twitter to sign up.
QuarkIP Proxy Configuration Guide
Common Mistakes to Avoid
❌ Using free or abused datacenter proxies.
❌ Switching IPs mid-process.
❌ Skipping cookie clearing.
❌ Creating multiple accounts on one IP.
🌟 Pro Tips for Twitter Success
👉 Pair one static proxy with one account.
👉 Check IP reputation regularly.
👉 Use anti-detect browsers for extra safety.
👉 Keep region and device consistent.

 By
By